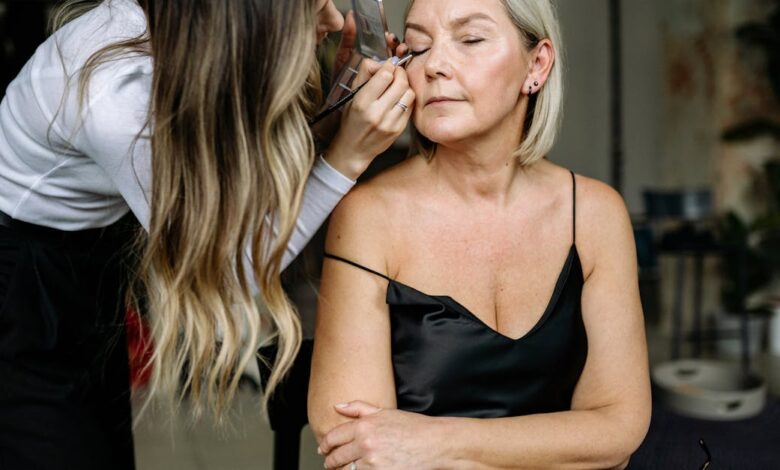
The Secret to Flawless Makeup for Mature Skin
You’ve likely noticed the buzz on social media about the trending “old lady makeup” style. With its focus on soft, radiant skin, creamy blush, and glossy lips, it unites vintage charm with modern simplicity. For some, this makeup style is stunning. However, many tutorials often overlook a crucial element: while makeup can seem magical, the real secret lies in the prep work. Yes, the preparation is paramount!
Whether you’re in your twenties eager to try this trend or a woman in her 50s, 60s, or even 70s aiming for a look that complements your skin, the approach remains consistent. For the best results, achieving hydrated, plump, and smooth skin is essential. The foundation of your makeup routine should allow products to sit gracefully on your skin instead of clinging to dry patches or settling unevenly into fine lines. Having consulted numerous clients in their 60s and beyond, I can attest that minor changes in preparation can radically transform your makeup experience without needing a complete product overhaul.
Today, we will dive deep into why these prep steps matter more than expensive serums or miracle anti-aging solutions. We will focus on straightforward, effective skincare practices designed to have your skin looking its best. Let’s get started!
This post contains affiliate links. If you make a purchase through my links, I may receive a small commission at no additional cost to you. I only recommend products I truly believe in.
Understanding Changes in Mature Skin
How Aging Affects Makeup Application
Let’s explore the reasons makeup performs differently on mature skin. This isn’t an indictment of your skin; instead, it’s about understanding its needs as it changes.
-
Reduced Oil Production: Natural sebum production decreases with age, leading to drier skin. This can result in makeup clinging to rough patches, making it appear less vibrant.
-
Altered Texture: As skin thins over time, imperfections such as fine lines and enlarged pores become more pronounced. This doesn’t make your skin less beautiful; it simply means it requires tailored prep.
-
Loss of Firmness: Collagen and elastin production diminishes, causing skin to lose some of its plumpness. Makeup can settle in creases if proper hydration isn’t prioritized.
The key reframe here is this: instead of “fixing” aging skin, focus on treating it with care so your makeup enhances your natural beauty. Think of your skin as linen rather than cotton; though it requires different care, it’s just as stunning—perhaps even more so!
Essential Steps for Makeup Prep
The Three Pillars of Makeup Application
If you take only one thing from this article, make it this: makeup looks its best on skin that is hydrated, smooth, and protected. These are your three foundational steps.
Step 1: Deep Hydration
Plump, hydrated skin is vital for seamless makeup application. Lack of hydration means foundation can cling to dry patches, and powders may look dull. Hydration comes from water, while moisture entails oils. You need both; however, hydration should be your priority. If your skin is thirsty, a rich cream won’t solve the issue.
Step 2: Smooth Texture
The surface on which makeup sits should be soft and even. This means gently exfoliating dead skin cells and flakes without causing irritation. Avoid harsh scrubs and daily chemical peels, as they can leave your skin raw, resulting in makeup that appears worse instead of better.
Step 3: A Healthy Skin Barrier
Your skin barrier is the outermost layer that retains moisture and shields against irritants. An impaired barrier can lead to red, sensitive skin where makeup only enhances these imperfections. A healthy barrier allows hydration to be locked in, making it essential for mature skin. Using oils and occlusives can help seal in moisture and provide a smooth canvas.
Creating Your Natural Makeup Routine
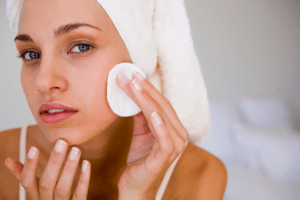
Step 1: Gentle Cleanse
Start with a hydrating, non-stripping cleanser. Cream and oil-based cleansers are your allies here, gently removing makeup and dirt without leaving skin feeling tight.
What to Look For:
- Cream cleansers
- Cleansing balms
- Micellar water
Tip: Cleanse at night to remove makeup and SPF. In the morning, consider rinsing your face with water instead of using a cleanser if your skin feels balanced.
Step 2: Hydrating Toner or Essence
This often-overlooked step can dramatically improve how your makeup sits. Apply your toner or essence while your skin is slightly damp from cleansing, locking in that layer of hydration for better absorption.
What to Look For:
- Hyaluronic acid
- Glycerin
- Aloe vera
- Rose water
These humectants attract moisture to your skin.
Step 3: Layer in a Serum
This step is optional but can elevate your routine. A hyaluronic acid serum can provide serious hydration, temporarily filling fine lines for a bouncy, youthful appearance.
If you’re up for it, consider adding Vitamin C for brightening, or Niacinamide for improved texture and redness reduction.
Application: Gently press serums into damp skin with your fingertips.
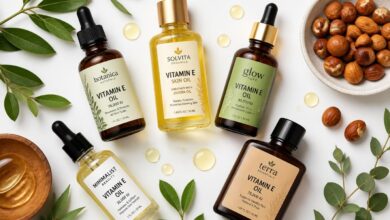
Step 4: Apply Facial Oil
Despite common misconceptions, using facial oil does not cause makeup to slide off. Instead, the right oils create a smooth base that enhances makeup.
Best Oils for Makeup Prep:
- Squalane oil
- Rosehip oil
- Jojoba oil
- Marula oil
Using just 2-3 drops, warm the oil between your palms and lightly press it into your skin.
Step 5: Moisturizer
Lock in hydration with a suitable moisturizer. For mature skin, opt for richer options with shea butter and ceramides, while those with combination skin may prefer a lightweight gel-cream for hydration without excess oil.
Allow your moisturizer to absorb for a few minutes before applying makeup.
Step 6: Apply Sunscreen
Regardless of the weather or your plans, apply sunscreen daily. UV damage compromises collagen, leading to premature aging.
What to Look For:
- Mineral or chemical sunscreen
- No white cast
- Compatible with makeup
Allow your sunscreen to set for a few minutes for the best results.
Step 7: Primer (if necessary)
If you find your skincare routine is doing well, you may not even need a primer. However, if you desire extra smoothing or are preparing for an all-day look, a hydrating primer can be beneficial.
Key Ingredients to Consider
The Stars of Your Prep Routine
When it comes to prepping your skin, specific ingredients can vastly improve your results.
Hyaluronic Acid
An essential humectant, it holds up to 1,000 times its weight in water, providing a plump and smooth finish that makeup adores.
Glycerin
This gentle yet effective humectant draws moisture in and enhances texture, making it a staple in many skincare products.
Squalane
This lightweight oil mimics natural skin oils, absorbing quickly for a dewy finish.
Rosehip Oil
Rich in vitamins, rosehip oil enhances your skin tone and texture, giving both immediate and long-term results.
Aloe Vera
Known for its soothing properties, aloe vera hydrates and calms, making it perfect for sensitive skin.
Niacinamide
This powerhouse ingredient helps refine skin texture, evens out tone, and calms redness.
Common Mistakes to Avoid
Prep Pitfalls
To elevate your makeup prep experience, be wary of these common mistakes.
-
Avoid Harsh Exfoliation: Scrubs and aggressive peels can damage your skin barrier. Instead, introduce gentle exfoliation once or twice weekly.
-
Don’t Skip Hydration: Even oily skin can be dehydrated. Always hydrate first to ensure your makeup sits well.
-
Resist the All-Matte Look: Matte foundations can make skin appear lifeless. Opt for satin or dewy finishes for a more natural look.
-
Avoid Immediate Makeup After Exfoliating: Your skin may be sensitive post-exfoliation. Allow it to recover overnight for optimal makeup application.
-
And Don’t Forget Your Neck: Makeup often extends beyond the face. Treat your neck to the same care.
Making Your Makeup Work for You
Tips for Harmonious Application
When you’ve put in the effort to prep your skin beautifully, ensure your makeup selects complement that work, not against it:
- Use a damp beauty sponge for foundation to enhance hydration and achieve a natural finish.
- Choose satin or dewy foundation finishes rather than matte options.
- Apply powder sparingly, targeting high-need areas, such as the T-zone and under the eyes, while leaving the rest soft and luminous.
- Embrace cream products—cream blush and bronzer, for instance—meld into prepped skin seamlessly.
Celebrating Natural Beauty
Embrace the Vintage Glamour
The “old lady makeup” trend celebrates skin rather than masks it. It’s not about aggressive contouring; it emphasizes natural beauty and a fresh complexion. Here’s how to recreate the look:
- Prep your skin using the above methods.
- Select a lightweight, dewy foundation or tinted moisturizer.
- Add cream blush to the apple of your cheeks.
- Softly fill in your brows for a natural look.
- Apply a hint of highlighter to your cheekbones and cupid’s bow for that extra glow.
- Finish with a glossy or satin lip.
This makeup style is all about highlighting your skin’s natural beauty, enhancing it with simple products instead of a heavy mask.
Conclusion: The Magic of Skincare in Makeup
Your skin tells a story, and how you prep it can enhance its narrative beautifully. Regardless of your age—be it 30, 50, or 80—the skincare principles remain the same: hydrate, smooth, and protect.
Utilizing natural skincare to create a long-lasting base leads to improved makeup performance, allowing it to enhance rather than cover your unique beauty.
Take the time to care for your skin, giving your makeup the perfect canvas to shine. Embrace your age, care for your skin, and let the magic of makeup make you feel vibrant and beautiful.