Whether you’re a total newbie or just looking to level up your technique, this guide walks you through how to install wig step by step — from prepping your natural hair to laying your edges like a pro. No guesswork, no glue disasters. Just gorgeous results.
This post contains affiliate links. If you purchase through my links, I may earn a small commission at no extra cost to you. I only ever recommend products I genuinely believe in.
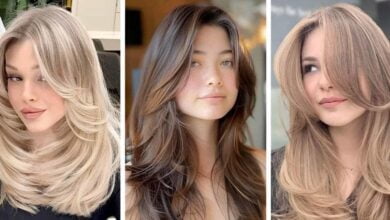
Oh, honey — if you’ve ever watched someone rock a flawless wig and thought “How in the world do they do that?”, you are absolutely in the right place! Wigs have come such a long way. We’re talking glueless installs, HD lace, pre-bleached knots, baby hairs that look straight-up real — it’s honestly a golden era for wig lovers. But here’s the thing: even the most luxurious wig can look like a costume if it’s not installed properly. And we don’t want that for you!
So let’s get into it. This is your step-by-step, no-fluff, real-talk guide on how to install wig step by step — whether you’re going full glue, glueless, or somewhere in between. Grab your edge brush and let’s get to work.
Why the Installation Process Actually Matters
Here’s a truth most people skip right over: the wig itself is only half the equation. The installation method makes or breaks the final look. A $500 wig can look cheap with a bad install. Meanwhile, a $150 unit from a solid supplier like Ashimary Hair can look absolutely stunning when installed with care and technique. The difference? Preparation, patience, and a little bit of know-how.
Also — and this is huge — improper installation can damage your natural hair and your scalp. Over-using adhesives, skipping protective layers, or pulling too tight can cause traction alopecia, irritation, and breakage over time. So whether you’re doing this for style, confidence, or protective purposes, doing it right from the jump protects your crown while keeping you gorgeous. Win-win!
What You’ll Need Before You Start
Before we dive into the actual steps, let’s talk supplies. Being prepared is half the battle — seriously. Running around looking for your got2b glued while your wig is halfway on your head is not the vibe.
Here’s a quick checklist of what to have on hand:
- A wig cap (mesh or nylon — pick your preference)
- Wig adhesive or glue (like Ghost Bond XL or got2b Glued Spray)
- Scalp protector (non-negotiable if you’re using glue!)
- Bobby pins or wig clips
- Edge control or edge brush
- Rattail comb
- Scissors (small, precise ones)
- Hair clips for sectioning
- A flat iron or blow dryer
- Makeup or foundation that matches your skin tone (for the lace)
- Setting spray
Optional but highly recommended:
- Wig grip band (amazing for glueless installs)
- Transparent or matte elastic band
- Lace tint spray
You can grab most of these in a bundle — Amazon actually has some great starter kits. Check out the Complete Wig Installation Kit on Amazon to get everything in one shot.
Step 1 – Prepare Your Natural Hair
Alright, let’s officially kick things off! The very first step — and arguably the most important — is getting your natural hair ready. If your foundation isn’t solid, everything else suffers.
Start by washing and conditioning your hair if it hasn’t been done recently. Clean hair is easier to lay flat and won’t add bulk under your wig. Once clean, detangle thoroughly with a wide-tooth comb, starting from the ends and working your way up toward the roots. No ripping through knots — we’re being gentle here!
Now, braid or twist your hair down flat. The goal is to create as smooth a surface as possible. You can do flat braids across the head, cornrows going straight back, or two-strand twists pressed flat — whatever keeps your hair flattest and most secure. For thicker or longer hair, cornrows are usually the best bet. Once braided, apply a light layer of edge control or gel to smooth down any flyaways, then use a stocking cap or wig cap over the top for a clean base.
Step 2 – Apply Your Wig Cap
Okay, so the wig cap isn’t just there to look pretty — it actually does a lot of heavy lifting! It holds your braids down, gives adhesive something to grip, and creates a more natural-looking scalp color baseline under the lace.
Pull your wig cap over your head and adjust it so it sits right at your natural hairline — not too far back, not too far forward. Snip off any excess at the nape if it’s bunching. Lots of stylists recommend using a cap that closely matches your skin tone so there’s less visible contrast, especially with thinner laces. Got2b spray or a light-hold hairspray spritzed over the cap can help keep it in place while you work.
If you’re doing a glueless install (aka no adhesive — hallelujah for sensitive scalps!), this is also where a wig grip band really comes into play. Slide it over the cap at your hairline — it adds serious grip and holds the wig in place without a drop of glue. Kiss Love Hair has a great range of glueless wigs designed specifically to work beautifully with this method, by the way.
Step 3 – Customize the Lace (Don’t Skip This!)
Oh, this step is a GAME CHANGER. Pre-cut lace wigs are convenient, but if you really want a seamless install, taking time to customize the lace makes all the difference.
First, try the wig on without any adhesive. Hold it in place and check where your natural hairline falls. Using small scissors, carefully trim any excess lace — but go slowly! You can always cut more; you can’t put it back. Trim in small, curved snips to mimic the natural, irregular shape of a hairline.
Next, tint the lace if it doesn’t already match your skin. You can use a foundation or concealer slightly darker than the lace to knock out that “white cast” that screams wig from a mile away. Lace tint spray (available on Amazon) is even easier and more consistent. Once that’s done, you’re ready for the real magic.
Step 4 – Apply Scalp Protector and Adhesive
Now we’re getting serious. If you’re going the glue route, applying a scalp protector is absolutely non-negotiable. Products like Vapon No-Tape or a DIY version using petroleum jelly create a barrier between the adhesive and your skin. This step prevents irritation, allergic reactions, and makes cleanup SO much easier.
Apply the protector along your hairline and let it dry fully — usually 5 to 10 minutes. Then apply your wig adhesive in a thin, even layer along the same hairline. Less is more! A thin coat dries faster and holds better than a thick goopy layer that never fully cures. Wait until the glue is “tacky” — slightly dry but still sticky — before placing the wig. If you touch it and your finger pulls away with a clean “click” feeling, it’s ready.
Step 5 – Place and Press the Wig
This is the exciting part — the moment of truth! Position the wig from the front of your hairline, gently pressing it down into the adhesive. Work from the center outward toward the temples. Use a rattail comb or the back of your edge brush to press firmly along the lace, making sure every bit is bonded and smooth.
Wrap an elastic band or scarf around your hairline (not too tight!) and let everything dry for about 15 to 30 minutes. This step is where patience becomes your best friend. Rushing and pulling off the scarf too soon can lift the lace and ruin your bond. Make yourself a coffee. Scroll your feed. Let it set!
Step 6 – Style and Blend
Woo! You’re almost there — this is where the real transformation happens. Now that the wig is secured, it’s time to style and blend everything so it looks like it’s literally growing from your scalp.
Use a flat iron or curling wand to style the wig hair to your liking. Then take a little bit of edge control (a classic like Eco Styler Gel works great) and lay those baby hairs with an edge brush. Use a toothbrush for even finer control. Swoop, curl, twist — make it your own! Finally, give everything a light mist of setting spray to lock in the style and reduce frizz throughout the day.
This is also where knowing how to install wig step by step really pays off — because you can customize the final look exactly to your taste.
How to Install a Wig Step by Step – Glueless Method
Not into adhesives? Totally valid! The glueless wig method has exploded in popularity — and for good reason. It’s faster, gentler on your hairline, and gives you the flexibility to take the wig on and off without a 20-minute removal process.
For a glueless install, you’ll rely on:
- A wig with built-in combs or clips
- A wig grip band along the perimeter
- A snug wig cap
- Bobby pins placed strategically at the nape and temples
The technique is largely the same — prep your hair, put on your cap, customize the lace, position the wig — but instead of adhesive, you’re relying on mechanical grip. Many people find that after adjusting the straps inside the wig to their head size and using a quality wig grip band, the wig holds just as well as a glued install throughout a full day.
Ashimary Hair and Kiss Love Hair both carry excellent glueless options with adjustable straps, elastic bands, and pre-bleached knots that make the no-glue life incredibly easy.
Common Mistakes to Avoid
Let’s be real — even experienced wig wearers make mistakes sometimes. Here are the big ones to watch out for:
- Skipping scalp protector and applying glue directly to skin — ouch!
- Cutting too much lace off at once (always trim conservatively)
- Not waiting for adhesive to become tacky before placing the wig
- Wearing a wig for too many days without cleaning the adhesive buildup
- Applying heat directly to synthetic fibers (use heat only on human hair wigs)
- Ignoring the back and sides of the wig — the nape needs to be secured too
- Forgetting to bleach the knots, which makes the hairline look unrealistic
Frequently Asked Questions
How long does it take to install a wig? Once you’ve got the hang of it, a basic install takes about 30 to 60 minutes. Your first few times might take longer — and that’s perfectly okay! Practice makes perfect.
Can I sleep in my wig? You technically can, but it’s not recommended long-term. Sleeping in a wig causes friction, tangling, and can loosen your bond. If you do sleep in it, use a silk or satin bonnet to reduce friction.
How do I remove a glued wig without damaging my edges? Use an adhesive remover like C22 Solvent or isopropyl alcohol, applied gently along the hairline. Never yank or peel — work slowly and let the solvent do its job. Amazon has several well-reviewed wig adhesive removers to choose from.
How often should I reinstall my wig? Most people reinstall every 1 to 2 weeks. Leaving adhesive on for too long can cause buildup, irritation, and potential hair loss along the hairline.
Do I need to bleach the knots? For a realistic look, yes — especially on darker wigs. Bleached knots remove the dark dot at the base of each hair strand on the lace, making it look like hair is growing from your scalp.
Wrapping It All Up – Your Glow-Up Awaits!
And there you have it — the full, unfiltered breakdown of how to install wig step by step like a pro. From prepping your natural hair, to customizing the lace, to laying those edges into oblivion — you’ve now got everything you need to walk out the door looking absolutely snatched.
Remember, the first install won’t be perfect — and that’s completely fine! Every stylist you admire was once fumbling with their glue stick and wondering why their lace was lifting. The secret is just to keep practicing, keep learning, and don’t be afraid to experiment with different methods until you find what works best for your lifestyle and your hair type.
Whether you go glue or glueless, HD lace or transparent, short bob or waist-length body wave — the most important thing is that you feel confident and beautiful. And trust us, once you nail this process? You’ll never look back.
Now go slay, sis. You’ve got this!