Sephora Skincare Products: Natural DIY Serum Alternatives That Cost A LOT Less
Unlocking the Secrets of Skincare: DIY Recipes for Effective Serums
When it comes to skincare, especially products from well-known brands like Sephora, many people believe they are paying not just for quality ingredients but also for luxurious packaging. As a certified organic skincare formulator with nearly a decade of experience, I often examine ingredient lists with a critical eye. The reality is, the active components that truly benefit your skin can usually be sourced elsewhere, often at a fraction of the cost.
This isn’t an indictment of beautifully packaged skincare lines. Some of those products are genuinely crafted with skill. Instead, my aim is to equip you with the knowledge to make informed choices about your skincare routine. Once you grasp the essence of a serum’s formulation, you can easily determine if a hefty price tag is justifiable, or if a simple DIY version will suffice.
At heart, I am a creator. Making my own products brings an immense amount of satisfaction, knowing exactly what I am putting on my skin—its origin and production cost. The intent behind this article is to share that ethos.
This post contains affiliate links. If you make a purchase through my links, I may receive a small commission at no additional cost to you. I only recommend products I truly believe in.
Understanding Serums: The Power of Key Ingredients
At its core, a serum serves as a delivery system designed to transport one or two active ingredients into the skin more effectively than standard moisturizers. Other components like thickeners, fragrances, and preservatives are merely there to enhance texture, aesthetic appeal, and shelf life. These add-ons do not contribute to your skincare— the active ingredients do.
Once you identify these key actives and comprehend their functions, you will find that creating a functional DIY alternative isn’t as daunting as it may seem. Results may vary, but I will be transparent regarding the limitations of your homemade options.
1. DIY Hydrating Serum: Aloe Vera and Glycerin
What the Commercial Serum Does
Many commercial hydrating serums boast key ingredients such as hyaluronic acid and polyglutamic acid. These humectants work together to draw moisture from the surrounding environment and retain it in your skin, resulting in a plump and comfortable complexion.
Why This is an Easy DIY Option
Humectants are widely accessible and user-friendly ingredients. For example, aloe vera gel is a natural humectant that also forms a light protective film on the skin. Vegetable glycerin, a trusted skincare staple for over a century, is another affordable option. If you’re interested in leveling up your DIY game, hyaluronic acid powder is available and reasonably priced, typically between eight to ten pounds.
The DIY Recipe
- 4 tablespoons pure aloe vera gel
- 1 teaspoon vegetable glycerin
- Optional: 2-3 drops hyaluronic acid serum
Mix these ingredients in a clean bowl and transfer to a dark glass bottle or pump. For optimal results, apply this mixture to clean, slightly damp skin—the moisture enhances the efficacy of humectants.
Realistic Expectations
This DIY alternative is genuinely comparable to its commercial counterpart for everyday hydration. Although the texture may differ slightly, the hydrating benefits remain effective for many users.
2. DIY Bakuchiol Anti-Aging Serum: A Clean Alternative
What the Commercial Serum Does
Commercial bakuchiol serums often contain one percent of this plant-derived compound. Bakuchiol stimulates collagen production, supports cell turnover, and diminishes fine lines and dark spots without causing the irritation commonly associated with retinol.
Why This is a Near-Perfect Swap
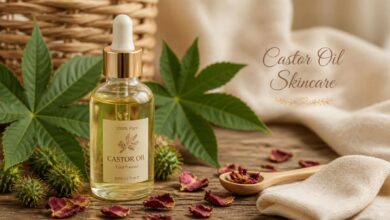
Bakuchiol remains consistent, regardless of whether it’s part of an expensive serum or a DIY blend. You’re simply eliminating the premium cost by opting for a homemade version. Combine it with rosehip oil, rich in vitamin A precursors and antioxidants, for a potent anti-aging solution. A few drops of vitamin E can also extend the shelf life and enhance antioxidant properties.
The DIY Recipe
- 1 tablespoon rosehip oil
- 1 teaspoon bakuchiol oil
- 3 drops vitamin E oil
Mix in a dark glass dropper bottle and use three to four drops on clean skin at night. This oil-based combination is highly stable and remains effective longer when stored properly.
Realistic Expectations
This DIY serum is nearly identical in effectiveness to its commercial counterpart. Although the texture may differ due to additional polymers used in commercial products, the anti-aging results are similar, especially with consistent use over eight to twelve weeks.
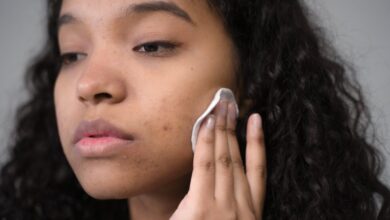
3. DIY Dark Spots Serum: Fresh Papaya and Natural Brighteners
What the Commercial Serum Does
Dark spots serums usually target hyperpigmentation using niacinamide to regulate melanin production, along with papain enzyme from papaya to exfoliate and promote cell renewal.
The Papaya Revelation
One exciting insight is that unripe papaya contains significant levels of papain, making a simple unripe papaya mask an effective alternative to expensive serums. To use, mash a few tablespoons of unripe papaya and apply it to clean skin for ten to fifteen minutes before rinsing.
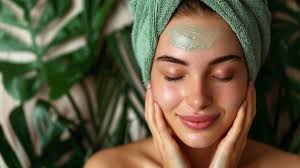
The DIY Recipe: Brightening Papaya Mask
- 2 tablespoons mashed unripe (green) papaya
- A pinch of turmeric powder
- 1 teaspoon aloe vera gel
Mix, apply for ten to twelve minutes, and rinse well. Use this mask once or twice a week, and as always, conduct a patch test first.
Realistic Expectations
This mask is gentler and less standardized compared to commercial options, which means it may not be as effective for everyone. However, using the whole fruit often offers a more wholesome skincare experience.
4. DIY Vitamin C Glow Serum: The Stability Factor
What the Commercial Serum Does
Commercial glow serums often use a blend of stabilized vitamin C derivatives alongside vitamin E and sunflower oil. The primary goals are to brighten skin, create a more even tone, and provide antioxidant protection.
The Honest Truth About DIY Vitamin C
Creating a homemade vitamin C serum using pure ascorbic acid can be tricky due to its instability. It can oxidize rapidly, losing effectiveness almost immediately. Instead, I recommend using rosehip oil, which contains natural precursors to vitamin C in a stable form.
The DIY Recipe
- 1 tablespoon rosehip oil
- 3-4 drops vitamin E oil
- Optional: a tiny pinch of turmeric (test carefully, as it may stain)
Combine in a dark glass dropper bottle and apply on clean skin at night. Shake gently before each use.
Realistic Expectations
Understand that this DIY blend won’t precisely mimic the commercial serum’s effects. However, rosehip oil has a proven track record for brightening skin and improving tone.
5. DIY Gentle Peeling Serum: Fermented Rice Water and the Acid Truth
What the Commercial Serum Does
Many commercial peeling serums use lactic acid (an AHA) paired with niacinamide and squalane to enhance texture and brighten the skin.
The Challenge of DIY Acids
Creating a DIY lactic acid serum can be challenging without lab-grade pH testing, as improper pH levels can lead to irritation. Instead, I recommend fermented rice water, which naturally contains mild lactic acid without requiring pH adjustment.
The DIY Recipe: Fermented Rice Water Toner
Soak two tablespoons of uncooked rice in one cup of distilled water for twenty-four to forty-eight hours. Strain the liquid and apply it to your skin with a cotton pad after cleansing. Store it in the fridge and use within five days.
Realistic Expectations
This DIY toner is a gentle exfoliant that offers a mild brightening effect. For those seeking more aggressive results, commercial serums will likely be more effective, but fermented rice water is a safe starting point for most skin types.
Storing Your DIY Serums: Best Practices
One important consideration is the longevity of your DIY blends. Unlike commercial products that often contain advanced preservatives, homemade versions require careful storage.
Oil-Based Blends
Those serums with oils, such as the bakuchiol and rosehip blends, are more stable. Store in dark glass bottles away from heat and light, expecting a shelf life of two to three months. If the oil smells rancid, discard it.
Water-Based Blends
Water-based serums are more susceptible to bacteria growth, so refrigerate and aim to use them within one week. Always make smaller batches to ensure freshness.
General Rules for All DIY Skincare
- Use clean hands or utensils to handle your creations.
- Store in sterilized glass containers.
- Keep products away from direct sunlight and humidity.
- Always patch-test before applying anything to your face.
Your DIY Starter Kit
If you’re ready to dive into creating your own skincare, here’s a simple list of essential ingredients you’ll need for the recipes above:
- Aloe vera gel: for hydration
- Vegetable glycerin: as a humectant
- Hyaluronic acid serum: optional for extra hydration
- Rosehip oil: base for brightening blends
- Bakuchiol oil: for anti-aging benefits
- Vitamin E oil: antioxidant and natural preservative
- Unripe papaya: from your local grocery store
- Uncooked rice: likely already in your pantry
Total investment should be around twenty-five to thirty-five pounds, offering you multiple homemade serums for long-term use compared to the hefty price tag on commercial products.
Final Thoughts
I’m not suggesting you should discard everything in your skincare cabinet. I also use specially curated products and believe some commercially available items are genuinely exceptional. What I offer is the knowledge that crafting effective skincare at home is straightforward, economical, and very achievable. The essential ingredients that make high-end products effective are often those you can procure and combine on your own, bringing genuine results.
For hydration, anti-aging, and gentle brightening, the DIY recipes shared here offer strong alternatives. For vitamin C, while you may need to adjust your approach, natural options like rosehip oil can yield rewarding results. In terms of exfoliation, fermented rice water is a gentle and safe option to start with before considering stronger acids. Ultimately, it is your choice, now armed with the knowledge to shape your skincare routine.