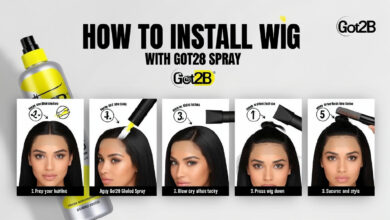
How to Install Wig Clips: The Ultimate Step-by-Step Guide for a Secure, Natural-Looking Fit

Installing wig clips doesn’t have to feel like rocket science. Whether you’re a total newbie or just tired of your wig shifting at the worst possible moment, this guide walks you through every single step — clearly, confidently, and with zero overwhelm. Let’s get into it!
This post contains affiliate links. If you purchase through my links, I may earn a small commission at no extra cost to you. I only ever recommend products I genuinely believe in.
Why Wig Clips Are a Total Game-Changer
Oh, the horror of a sliding wig! If you’ve ever felt that subtle shift during a meeting, a date, or — heaven forbid — while dancing, you know exactly what we’re talking about. Wig clips, also called snap clips or comb clips, are tiny but mighty little fasteners sewn into the inside of a wig cap to grip your natural hair (or a wig cap liner) and keep everything right where it belongs. And the best part? Once you learn how to install wig clips, you’ll wonder how you ever lived without them.
This guide is packed with practical advice for beginners and seasoned wig-wearers alike. We’ll cover everything from what wig clips actually are, the tools you’ll need, a step-by-step installation process, common mistakes to avoid, and expert tips to make your wig feel like a second scalp. Seriously, let’s do this!
What Are Wig Clips, and Do You Really Need Them?
The Basics — What Exactly Is a Wig Clip?
A wig clip (also called a snap clip, hair comb clip, or wig comb) is a small alligator-style or comb-style fastener — typically made of metal or sturdy plastic — that attaches to the inside of a wig cap. When you press the clip into your natural hair or the mesh of a wig grip band, the teeth lock in and hold the wig snugly in place. They’re discreet, lightweight, and super effective, especially for active lifestyles.

Think of wig clips like the seatbelts of the wig world. You might not always need them on a calm drive, but when things get bumpy (hello, windy days and gym sessions!), you’ll be thanking yourself for having them. Many wigs from brands like Ashimary Hair and Kiss Love Hair come with pre-installed clips, but plenty of others — especially fashion wigs and budget-friendly options — don’t. That’s where DIY installation comes in.
When Should You Install Wig Clips?
Not every situation calls for wig clips, but here are some scenarios where they’re basically non-negotiable:
- You have an active lifestyle (working out, dancing, outdoor adventures)
- Your wig cap feels too loose or slides around
- You’re wearing your wig for an extended period — all-day wear, events, travel
- You prefer to skip wig glue or tape for a glue-free hold
- You have fine, slippery natural hair that doesn’t grip wig combs well on its own
If any of these sound like you, keep reading — because you’re exactly the person who needs to know how to install wig clips properly.
What You’ll Need Before You Start
Gather Your Tools — Don’t Skip This Step!
Before diving into the process of learning how to install wig clips, getting your supplies together will save you a ton of frustration. Here’s what you’ll need:
- Wig clips (snap comb clips in small, medium, or large) — you can find great options on Amazon here
- A needle and thread (black, brown, or a color matching your wig cap)
- Small scissors
- A wig head/mannequin stand (optional but hugely helpful)
- A thimble (your fingers will thank you!)
- A fabric marker or small pins to mark positions
Pro tip: Always buy wig clips that match the color of your wig cap lining. A black clip on a beige cap is a dead giveaway, and nobody wants that. Snap comb clips with 4–8 teeth tend to give the strongest grip without damaging your natural hair.
Choosing the Right Wig Clips
Not all wig clips are created equal! Here’s a quick breakdown:
- Alligator/snap clips — open and close like a clamp; great for fine or medium hair
- Comb clips — have a row of teeth that slide into hair; best for thick natural hair
- Pressure-sensitive clips — grip without teeth; ideal for very short or chemically treated hair
- Velcro wig strips — not technically clips but serve a similar purpose on wig grips
For most people, a standard 4-tooth or 6-tooth snap comb clip from Amazon will do the job perfectly. Check out this highly rated set on Amazon that many wig enthusiasts swear by.
Step-by-Step: How to Install Wig Clips Like a Pro
Step 1 – Position Your Wig on a Mannequin Head
Place your wig on a mannequin stand (or on your own head if you’re working solo — it’s doable!). Smooth it out so it sits naturally, just as it would when you’re wearing it. This helps you see exactly where the wig feels loose or where extra security is needed.
Most wig wearers install clips in four key positions: the front hairline center, both temples (left and right sides), and the nape of the neck. However, if your wig is particularly large or lightweight and prone to lifting, adding two clips along the crown or top sides isn’t a bad idea at all.
Step 2 – Mark the Placement Points
Using a fabric marker or small safety pins, mark exactly where each clip will go. The golden rule? Place clips where your natural hair is densest, because that’s where the clip teeth will grip best.
Here’s a standard placement guide for most wigs:
- 1 clip at the center front (1–2 inches from the front hairline edge)
- 1 clip at the left temple
- 1 clip at the right temple
- 1 clip at the nape/back center
For a fuller hold, add:
- 1 clip on the left crown
- 1 clip on the right crown
Step 3 – Thread Your Needle
Cut about 18 inches of thread and double it for extra strength. Thread it through your needle and tie a secure knot at the end. Choose a thread color that blends into the wig cap — this is purely aesthetic but matters if the inside of your wig is ever visible.
Don’t rush this part! A good knot means your clip stays put for months. A loose knot means… well, you’ll be doing this all over again. And nobody has time for that!
Step 4- Sew the Clip Into Position
Open the wig clip so it lies flat. Place the open clip at one of your marked positions on the inside of the wig cap, with the teeth pointing toward the wig’s perimeter (so they’ll point outward when worn — toward your hairline, not inward toward your scalp).
Now, sew through the small holes at each end of the clip and through the wig cap mesh. Use a whip stitch or a simple over-and-over stitch, going through each hole of the clip at least 4–6 times for a rock-solid hold. Then run the needle through the wig cap a couple more times and tie off with a secure knot.
Repeat this process for each clip. Take your time — this is truly where patience pays off!
Step 5 – Test the Clip Before Moving On
Before sewing the next clip, open and close the clip a few times to make sure it’s secure. Tug it gently. If it wiggles or feels loose, add a few more stitches. A well-installed clip should feel completely immovable from the wig cap itself.
This is one of those “measure twice, cut once” situations. A few extra minutes per clip now saves you a very embarrassing wig moment later!
Step 6 – Try the Wig On and Adjust
Once all your clips are installed, put the wig on! Section your natural hair (or smooth down your wig cap/grip band) and snap each clip into your hair. Walk around, shake your head, even do a little happy dance — your wig should stay exactly where you put it.
If something feels off — a clip too tight, pulling in a weird direction, or not gripping — don’t panic. Simply remove a few stitches and reposition. This is a very forgivable process.
Pro Tips and Common Mistakes to Avoid
Tips That Make All the Difference
Learning how to install wig clips is one thing; getting them to work beautifully is another. Here are the pro tips that separate a so-so result from a flawless one:
- Always wear a wig grip band if you have slippery or short natural hair — the clips attach to the band instead of struggling with sparse hair
- Don’t install too many clips — 4 to 6 is almost always enough; too many can cause scalp tension and discomfort
- Use a thimble — seriously, sewing through wig cap mesh and metal clips is tough on fingertips
- Replace clips every 6–12 months — the metal can loosen over time, especially with frequent use
- Condition and detangle your natural hair before clipping in — tangled hair makes clips feel uncomfortable and can cause breakage
Common Mistakes (And How to Dodge Them)
Aha — here’s where many beginners go wrong:
- Sewing clips too close to the edge — This causes the cap edge to buckle or fray. Always leave at least 1/2 inch from the perimeter.
- Using too-short thread — Running out of thread mid-stitch is annoying and weakens the attachment.
- Pointing clip teeth the wrong way — Teeth should always face outward toward your hairline when the wig is on your head, not inward toward your scalp.
- Skipping the mannequin — Without a head form, it’s hard to judge true clip placement and you often end up with an asymmetrical result.
- Using cheap, thin thread — Invest in upholstery thread or heavy-duty polyester; regular sewing thread can snap under tension.
Caring for Your Wig After Installing Clips
Maintenance Matters!
Once you’ve done the work of learning how to install wig clips, keeping both the clips and the wig in great shape becomes the priority. Metal clips can rust if exposed to moisture repeatedly (think post-gym sweat or rainy days), so drying your wig thoroughly before storing it is essential.
After each wear, gently brush or comb your wig (always from ends to roots), store it on a wig stand to maintain its shape, and inspect the clip stitching every month or so. If you notice fraying around a clip or a clip that no longer snaps shut firmly, it’s time to replace it. Ashimary Hair has a great guide on general wig care that’s worth bookmarking.
How Often Should You Replace Wig Clips?
For daily wig wearers, expect to replace clips every 6–9 months. For occasional wearers, once a year is typically sufficient. The clip mechanism itself wears out before the stitching does, so if a clip feels loose even when snapped shut, the spring inside has weakened and it’s time for a new one.
Frequently Asked Questions About Wig Clips
Can I install wig clips on a lace front wig?
Absolutely! In fact, combining wig clips with lace adhesive on a lace front wig gives you the most secure, natural-looking hold possible. Just be careful not to sew through the lace itself — attach clips to the wig cap portion only, along the sides and back where there’s solid cap material.
Will wig clips damage my natural hair?
When used correctly, wig clips should not cause damage. The key is not gripping the same section of hair day after day, and not clicking the clip shut so tightly that it pulls at the root. Rotating your clip placement slightly every few wears helps distribute tension and protects your edges. Kiss Love Hair has some excellent resources on protective styling with wigs to help you protect your natural hair while wearing wigs regularly.
How many wig clips do I need?
For most people, 4 clips is the sweet spot — front center, two temples, and nape. If your wig is very large, lightweight, or you’re particularly active, adding 2 more along the crown gives additional peace of mind. More than 6 clips is rarely necessary and can make your wig uncomfortable to wear.
Can I use wig clips without natural hair?
Yes! If you’re a total hair loss (alopecia) sufferer or a cancer patient, you can use wig clips with a wig grip band. The clips attach to the velvet or silicone grip band rather than your natural hair. Some wearers also sew a small piece of velvet ribbon inside the wig cap where the clips sit for extra grip on smooth surfaces.
What’s the best thread to use for sewing wig clips?
Heavy-duty polyester thread or upholstery thread is best. These hold up to repeated tension without breaking. Regular cotton sewing thread can fray and snap surprisingly quickly, especially at the clip’s metal edge.
Wrapping It All Up: Your Wig, Secured and Stunning
So there you have it — a complete, no-fluff guide to mastering how to install wig clips from start to finish. Whether you’re new to wigs or simply upgrading your technique, installing wig clips properly is one of those skills that genuinely transforms your wig-wearing experience. No more anxious tugs. No more mid-laugh shifts. Just a beautiful, confident, secure look all day long.
The bottom line? A few clips, a needle, some thread, and about 20 minutes of your time can completely change how your wig fits and feels. That’s a pretty incredible return on investment for something so simple. Don’t be afraid to practice — your first install might not be perfect, but by your third wig, you’ll be a total pro.
Now go grab those clips and get to work. Your best hair day is literally one stitch away!