Discover the Power of DIY Anti-Aging Serums with Castor Oil and Frankincense
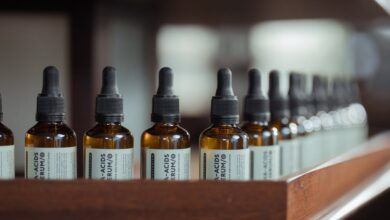
Are you finding yourself drawn to those pricey anti-aging serums that seem to promise miraculous results? Spending upwards of £50 for a mere 30ml of product that lasts only a few weeks can be disheartening. Trust me, I understand the quest for that elusive solution that keeps our skin looking youthful without breaking the bank. The truth is, you can create an equally effective (and sometimes superior) serum at home using just two ingredients you might already have: castor oil and frankincense essential oil. In this guide, I’ll show you how to mix, use, and customize these oils for your specific skin type—no marketing fluff, just practical recipes that work.
Why This Dynamic Duo Is Ideal for Anti-Aging
So, what makes castor oil and frankincense essential oil such a powerful combination for fighting the signs of aging? Let’s break it down.
The Benefits of Castor Oil
Castor oil is known for its rich consistency and high levels of ricinoleic acid, which comprises about 90% of its composition. This unique fatty acid offers a plethora of benefits, including:
- Boosting Collagen Production: Helps maintain skin structure and firmness.
- Reducing Inflammation: Calms irritated skin and reduces redness.
- Deep Hydration: Provides moisture without clogging pores, contrary to what you might expect from its thickness.
- Improving Skin Elasticity: Enhances skin’s ability to stretch and bounce back.
The Powers of Frankincense Essential Oil
Frankincense essential oil is revered for its ability to promote skin health, primarily through its regenerative properties. Here’s what it brings to the table:
- Cell Regeneration: Encourages the production of new skin cells.
- Fades Age Spots: Helps in diminishing sun damage and pigmentation.
- Tightens Skin: Provides a toned appearance, making skin look firmer.
- Reduces Fine Lines: Softens the appearance of wrinkles and fine lines.
Together, castor oil and frankincense create a powerhouse that is especially effective for mature skin, leading to noticeable improvements over time.
Quick Recipe Guide Based on Skin Type
Now that you understand the benefits of castor oil and frankincense, it’s time to choose a recipe that aligns with your needs. Here’s a helpful flowchart to guide you:
- Is this your first time making a face serum?
- Yes → Try Recipe 1 (Basic Beginner Version)
- No → Proceed to the next question.
- Do you have oily or combination skin?
- Yes → Go with Recipe 2 (Lightweight Daytime Version)
- No → Continue asking.
- Are you dealing with deep wrinkles or very dry, mature skin?
- Yes → Choose Recipe 4 (Night-Time Intensive Version)
- No → Opt for Recipe 3 (Advanced Anti-Aging Version)
Recipe 1: Simple Beginner Version
This recipe is ideal for newcomers and those looking to keep things straightforward.
Ingredients
- 30ml (2 tablespoons) castor oil
- 6 drops frankincense essential oil
- A small dropper bottle (30ml)
Instructions
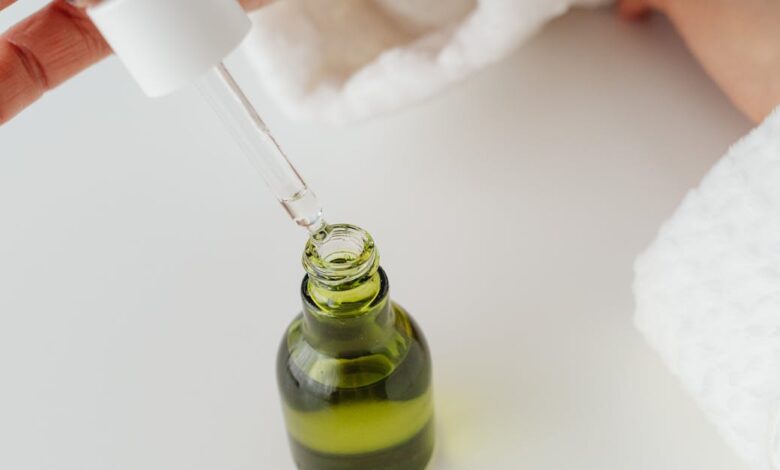
- Pour the castor oil into your clean, dry bottle.
- Add the frankincense essential oil.
- Cap tightly and shake for 30 seconds.
- Label with the date (shelf life: 6-12 months).
Usage
Apply 2-3 drops to damp skin after cleansing at night. Because this version is thicker, a little goes a long way. Use a gentle pressing motion rather than rubbing, focusing on areas with fine lines.
What to Expect
Your skin will feel nourished initially but will absorb after about 10 minutes. You’ll wake up with softer, plumper skin.
Recipe 2: Lightweight Daytime Version
If you have oily or combination skin, this version is perfect for daytime use.
Ingredients
- 15ml (1 tablespoon) castor oil
- 15ml (1 tablespoon) jojoba oil
- 5 drops frankincense essential oil
- 3 drops geranium essential oil
- Dropper bottle (30ml)
Instructions
- Combine castor oil and jojoba oil in the bottle.
- Add the essential oils.
- Shake well for 30 seconds.
- Label with the date.
Usage
Apply 2-4 drops to damp skin morning or night. Since this version absorbs quickly, wait 2-3 minutes before applying makeup or sunscreen.
What to Expect
You will notice a lighter feel on your skin. It still offers hydration without causing excess shine, making it perfect for underneath makeup.
Recipe 3: Advanced Anti-Aging Version
This is designed for those dealing with mature skin, sun damage, or pigmentation.
Ingredients
- 10ml castor oil
- 20ml rosehip oil
- 6 drops frankincense essential oil
- 4 drops lavender essential oil
- Dropper bottle (30ml)
Instructions
- Pour castor oil into the bottle.
- Add rosehip oil.
- Add essential oils and shake vigorously for 45 seconds.
- Label with the date (use within 6 months).
Usage
Apply 3-5 drops to cleansed, damp skin morning and night. This blend is highly effective for areas affected by hyperpigmentation and fine lines.
What to Expect
You should see improvements in skin tone and texture within 2-3 weeks. Dark spots will gradually fade, and skin will appear brighter.
Recipe 4: Night-Time Intensive Version
This is a go-to for anyone with very dry, mature skin in need of deep hydration.
Ingredients
- 20ml castor oil
- 8ml argan oil
- 2ml sea buckthorn oil
- 8 drops frankincense essential oil
- 2 drops sandalwood essential oil
- Dropper bottle (30ml)
Instructions
- Combine all carrier oils in the bottle.
- Add the essential oils and shake well.
- Label with the date.
Usage
Apply 4-6 drops to damp skin before bed, focusing more on dry areas. Allow it to sink in for about 10 minutes before lying down to prevent any staining.
What to Expect
This intensive repair formula leads to deeply nourished skin by morning, making it especially beneficial during colder months or after prolonged sun exposure.
Understanding Face Oils vs. Serums
Now you might be wondering about the terminology often associated with DIY skincare. Here’s a breakdown of the differences:
- -Product Type | What It Is | Key Ingredients | When to Use
-Face Serum | Lightweight, absorbs quickly, often water-based | Active ingredients or light oils | Morning and night, before moisturizer
-Face Oil | Pure oils without water | Carrier oils + essential oils | Day or night, instead of or mixed with moisturizer
-Face Cream | Emulsion of oil and water | Oils, water, and emulsifiers | Morning and night, after serum
While we’re primarily making a face oil here, many people refer to these recipes as serums due to their concentrated benefits and ease of use.
How to Incorporate Your DIY Serum Into Your Routine
Morning Routine
- Cleanse your face using your regular cleanser.
- Optionally tone your skin with a soothing agent, like rosewater.
- While skin is still damp, apply 2-4 drops of your chosen recipe.
- Press the oil into your skin (avoid rubbing).
- Wait 2-3 minutes for absorption, then apply sunscreen.
- Finish with makeup if desired.
Evening Routine
- Double cleanse (start with an oil cleanser, then a regular one).
- Optionally tone.
- While skin is still damp, apply 3-6 drops of the serum.
- Gently press into your face, neck, and décolletage.
- Wait 5-10 minutes for maximum absorption.
Target Areas
When applying, focus on areas of concern in this order:
- Eye area: Gently press around the orbital bone.
- Forehead: Address horizontal lines and areas between brows.
- Cheeks: Target spots where volume loss is noticeable.
- Around the mouth: Smooth out smile lines and areas above lips.
- Neck and décolletage: Often overlooked but crucial for overall skin appearance.
Storage and Shelf Life
Where to Store: Keep your serums in a cool, dark place, away from direct sunlight and excessive heat. A bathroom cabinet works well as long as it’s not too steamy.
Shelf Life:
- Basic version (Recipe 1): 12 months
- Recipes with jojoba or argan (Recipe 2 & 4): 12 months
- Version with rosehip (Recipe 3): 6 months (rosehip oxidizes faster)
Signs Your Serum Has Gone Bad:
- Rancid smell or off-putting aroma.
- A cloudy appearance.
- Significant color changes.
If any of these occur, it’s best to dispose of the batch and start fresh.
Troubleshooting Common Issues
Here are a few common problems and their solutions:
- Skin feels greasy or shiny: You may be using too much or the wrong recipe. Try using 1-2 drops less or switch to Recipe 2 for the daytime.
- Breakouts: This could be purging or an allergic reaction to an ingredient. Reduce usage to every other night and consider switching recipes if the issue persists.
- No noticeable results after 4 weeks: You might not be using enough or consistently enough. Try slightly increasing the amount or using it twice daily.
- Stinging or redness: You may have a sensitivity to the essential oils. Reduce the number of drops, and always do a patch test on the inner arm before full application.
- Staining from sea buckthorn oil (Recipe 4): This is normal and will fade within 20 minutes. Use less or skip it if you’re worried about staining.
Important Safety Notes
Always perform a patch test before your first application. Mix your serum, then apply a small amount to your inner forearm. Wait 24 hours to ensure there’s no redness or irritation. Avoid using these recipes if you are pregnant, have sensitive skin prone to reactions, or are allergic to any ingredients. Remember that dilution is essential; never apply frankincense essential oil directly on the skin without proper dilution.
Frequently Asked Questions
Can I use this if I have oily skin?
Absolutely! Recipe 2 is ideal for oily skin, as castor oil helps balance sebum production.
Will this clog my pores?
Generally, no. Castor oil has a low comedogenic rating of 1 out of 5, meaning it’s unlikely to block pores. However, everyone’s skin is different, so start slowly.
Can I add other essential oils?
Yes, you can enhance your serum by adding other essential oils known for their anti-aging properties, such as lavender or geranium. Just keep the total essential oil drops to a maximum of 10-12 for every 30ml.
Why not just use straight castor oil?
While you can apply castor oil directly, it can feel quite thick. Mixing it with lighter oils or essential oils improves application and enhances benefits.
When will I see results?
- Immediate: Your skin will feel softer and more hydrated.
- Two weeks: Fine lines may appear less pronounced.
- Four to six weeks: Noticeable improvement in skin texture and tone.
- Eight to twelve weeks: Significant reduction in deeper lines and improved overall skin tone.
Can I use this around my eyes?
Yes, but be gentle. Use one drop for both eyes and apply lightly around the orbital bone without getting too close to the eyelids.
Does castor oil truly help with wrinkles?
Research suggests that castor oil has positive effects on collagen and elastin production, which can improve the appearance of wrinkles. While it might not provide Botox-like results, it certainly aids in hydration and overall skin health.
Can I use this with retinol?
Yes, but not simultaneously. If you apply retinol at night, use your serum in the morning or on alternate nights.
I’m allergic to nuts; are these recipes safe?
Recipes containing jojoba and argan oils may pose a risk if you have severe nut allergies. Recipes 1 and 3 are nut-free. Always consult your doctor if you’re uncertain.
Can I add vitamin E?
Definitely! Natural vitamin E can enhance the serum’s shelf life and boost its anti-aging benefits. Just add 1-2 drops of d-alpha tocopherol.
Final Thoughts
Embarking on your DIY skincare journey might feel daunting at first, especially when we are so accustomed to high-end products adorned with fancy packaging. However, I’ve learned that simplicity often yields the best results. These recipes harness the power of proven ingredients—castor oil for collagen support, frankincense for cell renewal, and rosehip for vitamins A and C.
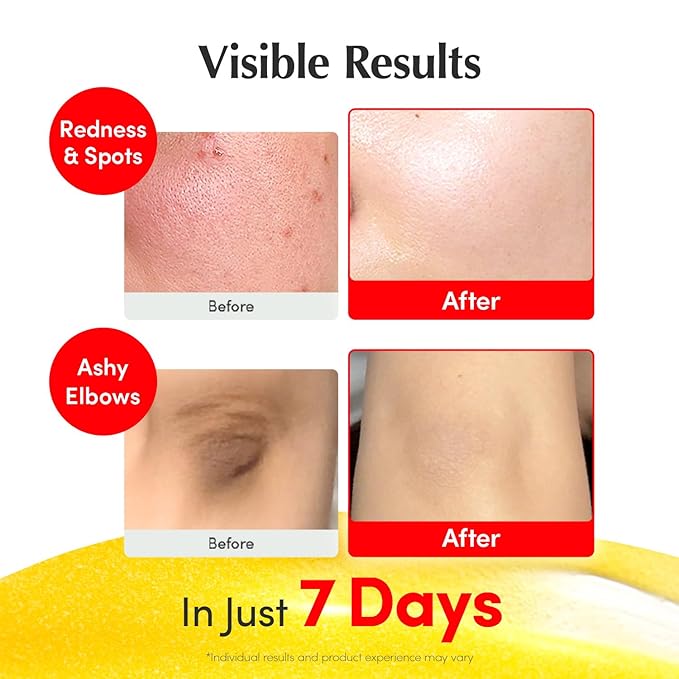
Start with Recipe 1 if you’re feeling hesitant; it’s beginner-friendly and requires minimal ingredients. Commit to using your homemade serum for eight weeks, and take before-and-after photos. You might be pleasantly surprised by the transformation. If you discover a recipe that works wonders for you, feel free to share your experience—I genuinely love hearing how these natural solutions have benefited others. Your skin deserves effective, wholesome ingredients, not just expensive labels.