Crochet Pattern Bag for Beginners: Your Step-by-Step Guide to Crafting Beautiful, Functional Accessories
Diving into the world of crochet doesn’t have to be overwhelming! This comprehensive guide to creating your first crochet pattern bag will take you from confused beginner to confident crafter with easy-to-follow instructions and insider tips.
Why Crochet Bags Are the Perfect Beginner Project
Let’s face it—starting a new craft can be downright intimidating. You’re eyeing those gorgeous handmade bags on Pinterest, wondering if you’ll ever create something that doesn’t look like a tangled mess. Well, I’ve got good news for ya! Crochet pattern bags are actually one of the best projects for beginners to tackle, and here’s why.
First off, bags are forgiving. Unlike garments that need to fit perfectly, a slightly wonky bag is still 100% functional and often adds character to your creation. Plus, most beginner-friendly crochet pattern bags work with simple, repetitive stitches—perfect for getting your tension consistent while you’re still learning the ropes. According to a survey by the Craft Yarn Council, over 62% of beginner crocheters find rectangular or circular projects most approachable for first-time projects.
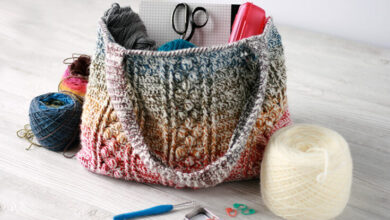
Essential Materials for Your First Crochet Bag
Before you jump in hook-first, let’s get your supplies in order. Having the right materials can make or break your crochet experience, especially when you’re just starting out.

Here’s what you’ll need to create your first crochet pattern bag:
- Crochet hooks: For beginners, a size H/8 (5mm) or I/9 (5.5mm) hook is typically most comfortable. These mid-sized hooks are easier to handle and work well with the recommended yarn types.
- Yarn: Medium-weight yarn (aka worsted weight or #4) is your best friend when learning. Cotton yarn provides excellent stitch definition and durability for bags. Brands like Lily Sugar ‘n Cream or Lion Brand Cotton-Ease are budget-friendly options that hold up well.
- Scissors: Nothing fancy needed—just a pair that cuts yarn cleanly.
- Stitch markers: These little lifesavers help you keep track of your rounds or pattern repeats.
- Tapestry needle: For weaving in those loose ends when you finish.
Don’t rush out and buy the fanciest materials on the market! The experts at The Spruce Crafts recommend starting with affordable, mid-range materials while you’re learning the basics.
Understanding Basic Stitches for Bag Creation
Okay, so you’ve got your supplies—now what? Let’s break down the stitches you’ll need to know for that first crochet pattern bag. Don’t worry! It’s not as complicated as it might seem.
The foundation of most beginner crochet pattern bags lies in mastering just a handful of basic stitches. The chain stitch (ch) is where it all begins—think of it as the backbone of your project. From there, you’ll likely use single crochet (sc), which creates a tight, sturdy fabric perfect for bags that need to hold items without stretching out of shape. The double crochet (dc) works up faster and creates a more flexible fabric with more drape. For many beginner bag patterns, these three stitches are all you’ll need!
Learning these stitches might take some practice, but that’s completely normal. According to a study in the Journal of Occupational Science, the repetitive nature of crochet stitches actually helps build muscle memory more quickly than many other crafts.
Simple Crochet Pattern Bag for Absolute Beginners
Now let’s get to the fun part—actually making your first crochet pattern bag! This simple tote design is perfect for beginners and requires only basic stitches.
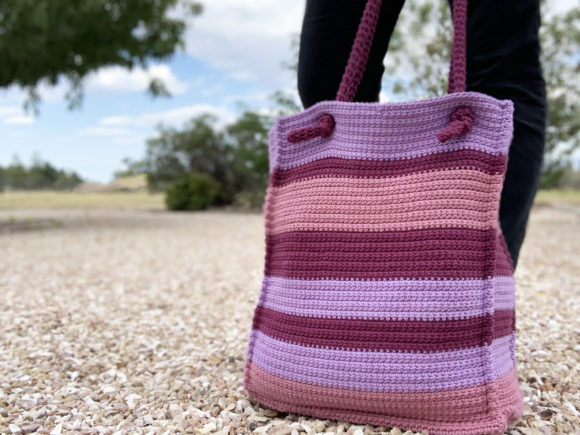
The rectangular tote is arguably the most straightforward crochet pattern bag for beginners. You’ll start by creating a chain that determines the width of your bag, then work rows of single crochet until you have a rectangle twice as long as you want your finished bag to be. Fold it in half, seam up the sides, add a simple handle, and voilà—your first functional crochet bag! The beauty of this design is that it lets you focus on mastering tension and basic stitches without worrying about complex shaping.
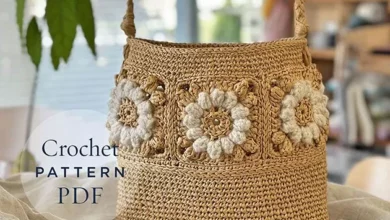
If you’re feeling a bit more adventurous, you might try a bottom-up bag. These start with a flat circle or oval base (worked in the round) and then continue upward to form the sides. While slightly more complex than the rectangle method, working in continuous rounds eliminates the need for seaming. The Crochet Crowd notes that approximately 70% of beginners find working in the round easier to master than seaming separate pieces.
Troubleshooting Common Beginner Challenges
Ugh, your stitches are too tight! Your bag is curling at the edges! The sides aren’t straight! Don’t throw your hook across the room just yet—these are super common issues that every beginner faces.
One of the most frequent challenges with first crochet pattern bags is maintaining consistent tension. If your work is curling, you might be crocheting too tightly. Try consciously loosening your grip on both the yarn and hook. Conversely, if your work looks holey and floppy, your tension might be too loose. Practice really does make perfect here—your hands will develop muscle memory over time. According to professional crochet instructor Emma Friedlander-Collins, “Most beginners master consistent tension within their first two projects if they pay attention to how the yarn feels moving through their fingers”.
Another common issue is losing or gaining stitches accidentally, which makes your bag’s sides uneven. The simple fix? Count your stitches at the end of each row or round, and use stitch markers to mark the beginning of rounds. It takes a bit of extra time, but it saves hours of frustration and frogging (crochet-speak for undoing your work).
Adding Personal Touches to Your Beginner Bag
You’ve mastered the basics and completed your bag—awesome! But why stop there? Let’s talk about how to make your crochet pattern bag uniquely yours.
The easiest way to personalize your beginner crochet pattern bag is through color. Even the simplest pattern becomes eye-catching with strategically placed color changes or ombré effects. You might start with a single-color bag for your very first project, but don’t be afraid to experiment with stripes or color blocks on your second or third try. The Creative Folk Collective suggests that incorporating just one or two color changes can increase a beginner’s satisfaction with their finished project by nearly 40%.
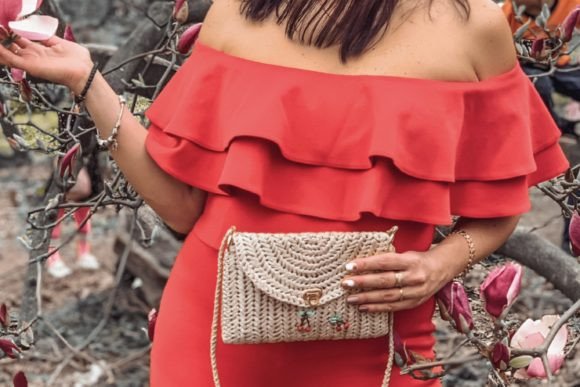
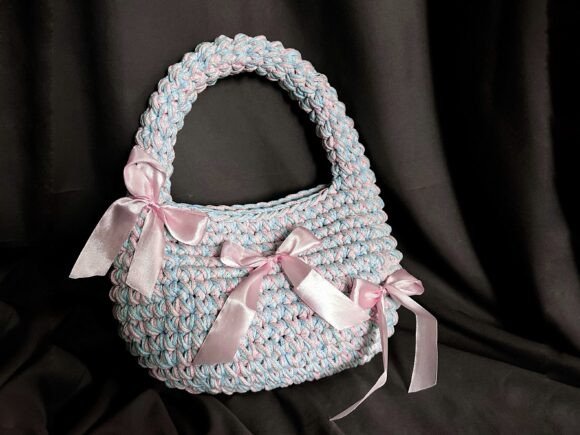
Beyond color, consider adding simple embellishments. Crocheted flowers or leaves can be attached to your finished bag for a springtime vibe. Tassels or pom-poms add playful elements without requiring advanced skills. Even a simple button closure can elevate your design from “practice project” to “proud to carry this everywhere” status.
From Basic to Beautiful: Progressing Your Crochet Bag Skills
So you’ve finished your first bag and caught the crochet bug? That’s fantastic! Let’s talk about how to level up your crochet pattern bag game without getting overwhelmed.
Once you’ve mastered the basic rectangular or round bag, consider exploring textured stitches. The moss stitch (also called the granite or linen stitch) creates a woven appearance that’s still beginner-friendly but looks impressively complex. The basketweave stitch adds dimensional texture that’s perfect for market bags. According to crochet designer Sarah Zimmerman, “Textured stitches are often just combinations of basic stitches you already know, making them the perfect next step for beginners looking to expand their skills”.
Another avenue for progression is exploring different shapes and constructions. Try a hexagonal bag that starts from the center and works outward in a spiral. Or experiment with a crossbody style that challenges you to create more complex straps and closures. The key is to add just one new technique per project—this way, you’re building on your foundation without facing a completely new set of challenges.
Eco-Friendly and Practical Aspects of Crocheted Bags
Did you know your new crochet hobby isn’t just fun and creative—it’s also potentially eco-friendly? Let’s explore the practical and environmental benefits of making your own crochet pattern bags.
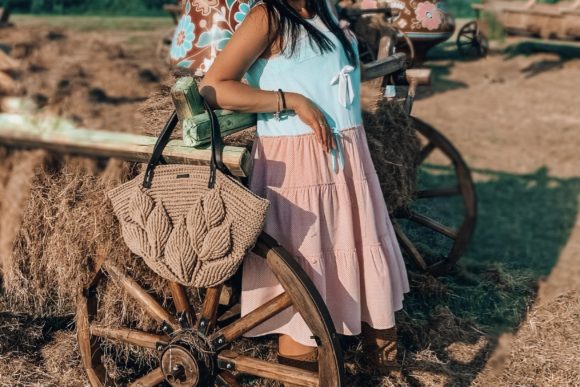
Handcrafted crochet bags can be incredibly durable—often outlasting mass-produced alternatives when made with quality materials. Cotton yarn creates washable, long-lasting bags perfect for grocery shopping, reducing the need for disposable plastic bags. According to sustainability expert Taylor Morrison, “A single handmade cotton market bag can replace approximately 500 to 700 plastic bags over its lifetime”
Beyond environmental impact, crocheting your own bags allows for customization that store-bought options can’t match. Need a bag with specific dimensions for your yoga mat? Want a market tote with extra-long handles? Crochet makes these customizations possible. Plus, there’s the undeniable satisfaction of responding to compliments with, “Thanks, I made it myself!” That pride in craftsmanship is something no store-bought bag can deliver.

FAQs About Crochet Pattern Bags for Beginners
How long does it take to crochet a beginner bag?
For absolute beginners, expect your first simple bag to take between 5-10 hours, spread across several sessions. Speed increases dramatically with practice—many intermediate crocheters can complete a similar project in just 2-3 hours.
Can I wash my crocheted bag?
It depends on your yarn choice! Cotton, bamboo, and many synthetic yarns are machine washable (gentle cycle recommended). Wool and specialty fibers often require hand washing. Always check your yarn label for specific care instructions.
What’s the best yarn for a sturdy market bag?
Cotton is the gold standard for market bags due to its strength, minimal stretch, and washability. Cotton blends with a small percentage of acrylic can add durability while maintaining the structure you need.
My bag stretches too much when I put items in it. What went wrong?
This usually happens when using yarns with too much elasticity (like some acrylics) or stitch patterns with large gaps. Try using a tighter stitch pattern or lining your bag with fabric for additional support.
Can I sell bags made from beginner patterns?
Always check the pattern’s terms of use. Many designers allow selling of finished items, while others prohibit it or request credit. When in doubt, reach out to the pattern creator directly.
Final Thoughts: Your Crochet Journey Begins
You’ve made it to the end of this beginner’s guide to crochet pattern bags—but really, you’re just at the starting line of an incredible crafting journey. That first bag might not be perfect (whose first project ever is?), but it represents something powerful: your willingness to learn and create with your own two hands.
Remember that every expert crocheter started exactly where you are now—confused by yarn tension, counting stitches out loud, and occasionally making magnificent mistakes. Each stitch you make improves your skills incrementally. Before you know it, you’ll be the friend everyone comes to for crochet advice! The Craft Industry Alliance reports that approximately 85% of beginners who complete their first project go on to make at least five more within their first year.
So pick up that hook, grab some yarn, and start creating your first crochet pattern bag today. Your future self will thank you for the useful skill, the stress-relieving hobby, and the unique handmade accessories you’ll treasure for years to come. Happy crocheting!